In case you missed Randall Oaks’ Needle Felt Cozy Creatures program last week, here is a little recap and some instructions in case you would like to attempt this craft at home.
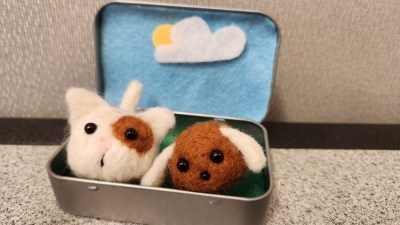
We created small cozy creatures such as cats, dogs, bunnies, and even a frog. We also decorated a small Altoid tin as a play pen for the little creature with felt sheet scraps and magnet tape. We felted small ovals to make the base of our cozy creature. We then decided what creature we wanted and made the ears and tails to match our desired creature.
For those who are brand new to the process of needle felting, it is a fiber arts craft that involves a specialized needle and loose fibers, pet hair, or wool roving. The art itself is very simple by combining the loose fibers into a loose ball or log and then poking the fibers with the specialized needle which tangles the fibers together and creates a dense shape that you can use to start your project. The easiest way to create the project you want to make is to break the object down into manageable shapes that make the object. For this project, I decided that we didn’t need the extra limbs such as legs or arms. I wanted a simple little creature that could fit in the Altoid tin.
For example, I made my tiny cat by felting the oval for the body of my cat, and then made two tiny triangles to be the ears, and then finally a small little log/snake to be the tail. From there it’s as simple as combining the shapes, by felting, or poking the shapes with your needle, to create your project.

Do Your Research
Some helpful hints in starting your needle felting journey.
First, I find that YouTube tutorials are very helpful when starting out. I recommend watching a few different videos before starting to see if it is a project you would like to try for yourself. There are many tutorials out there, I would start with a simple project and work your way up to something more complex. There are also books you can get from your library can give you project ideas as well!

Gather Your Materials
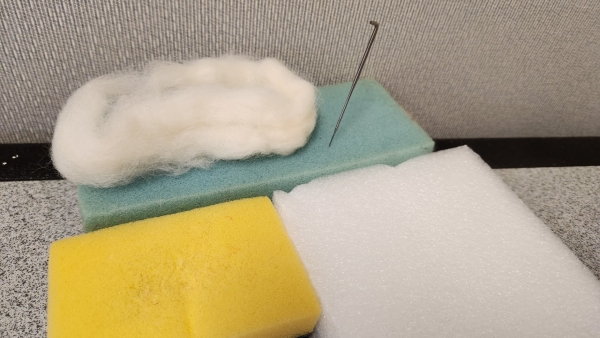
Second, you need to gather your materials. You will need the special needle felting needle which you can find in Hobby Lobby, Michaels, Jo-Ann Fabrics, and of course Amazon and Etsy. There are fancy needles with handles, there are packages of replacement needles, and there are multi-needle tools as well. I recommend a small package of plain replacement needles before investing in a tool or handle of any kind. You are guaranteed to break some needles when first starting out, everyone does, so having a small cheap supply of needles is highly recommended.
You will need your fibers; I recommend starting with wool roving which you can also find at the various craft stores listed above.
You will also need a felting mat to work your project on, in our class we used soft side of kitchen sponges, but I have had success with high density foam, soft sponges, and car wash sponges as well. As long as it is a soft springy material it should work well with needle felting.
There are also little kits you can buy that come with everything you need to get started with the project.

Take It Slow and Have Fun
Third, start out slowly, it is not a race, and you will need to move your piece. If your shape is an oval you will need to manipulate the wool to resemble an oval before you start felting, or poking it, with your needle. You will also need to rotate your piece as you felt. Ensure to get all sides of your piece so that it looks like an even oval on all sides. This might mean you need to have it sitting straight up, roll it on its side, flip it on its bottom, etc. Don’t just poke one area with your needle and expect it to turn out round.
Finally, take your time and enjoy the process; with some practice, patience, and possibly a lot of bandaids you can create your project and feel proud of your accomplishment.
Be on the lookout for future Randall Oaks Needle Felting programs and happy felting!